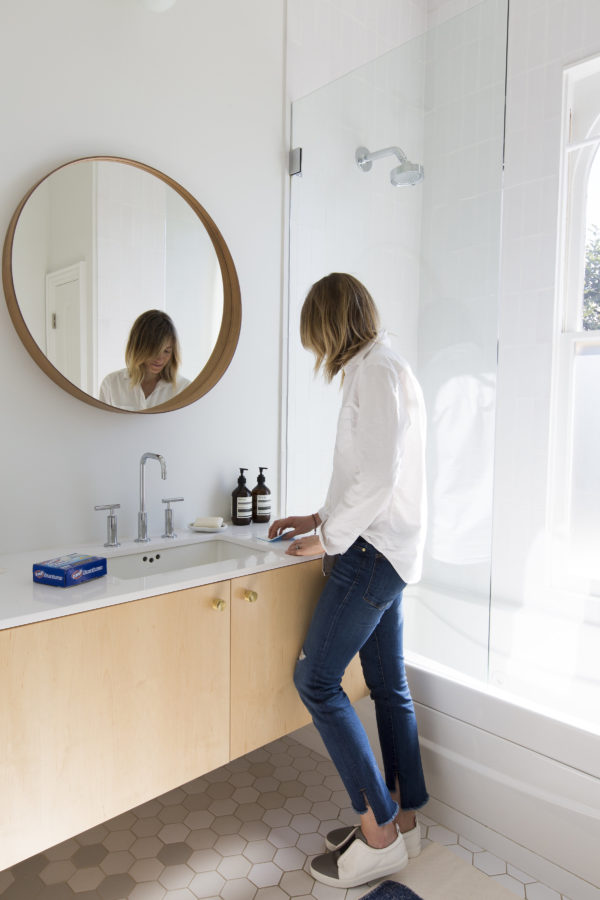
The alternative title to this post could also be “an embarrassing sneak peek into my filthy master bathroom.” While I regularly espouse an ideal way to move through life, I’m the first to admit that I often fall short of practicing what I preach. Because #reality. Case in point, my master bath. After years crammed into tiny loft spaces with even tinier bathrooms, I thought I’d stepped into heaven when I finally created my dream master bathroom.

But sadly, I let the expanse of space get the best of me. Slowly but surely my dream oasis transformed into a hotbed of clutter, grit, and grime. The problem with drawers? You can hide all your problems in them! However, I’ve got the spring cleaning fever and so last week I decided to get down and dirty, dig out all the clutter, fully deep clean my vanity and return my master bath to its dream state – as nature and my design originally intended. I was so committed to this project that I even decided to make a video documenting the entire thing! Scroll down to the bottom of this post to check it out.

For those who do prefer to read, I’m also recapping my process below. I hope it inspires you to deep clean the trouble spots in your house.

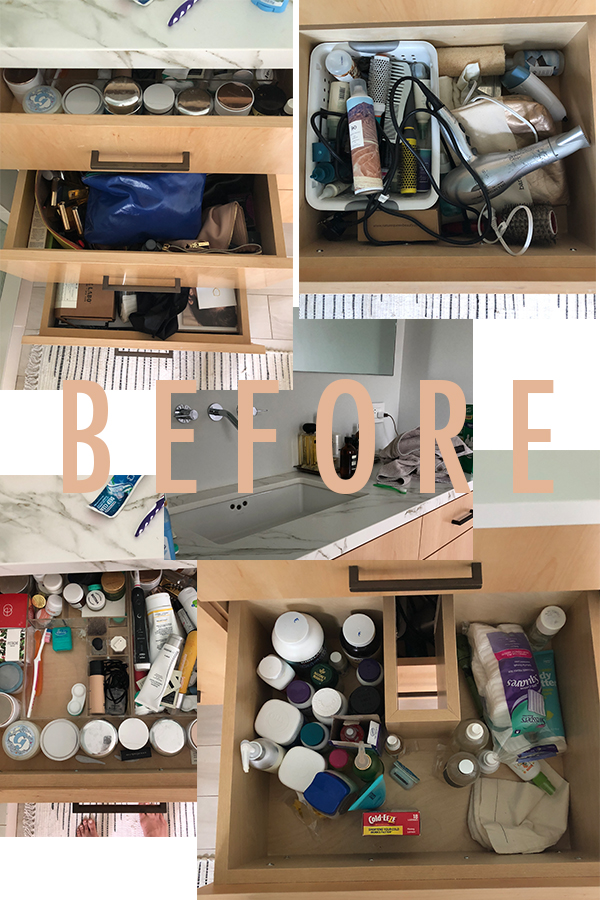
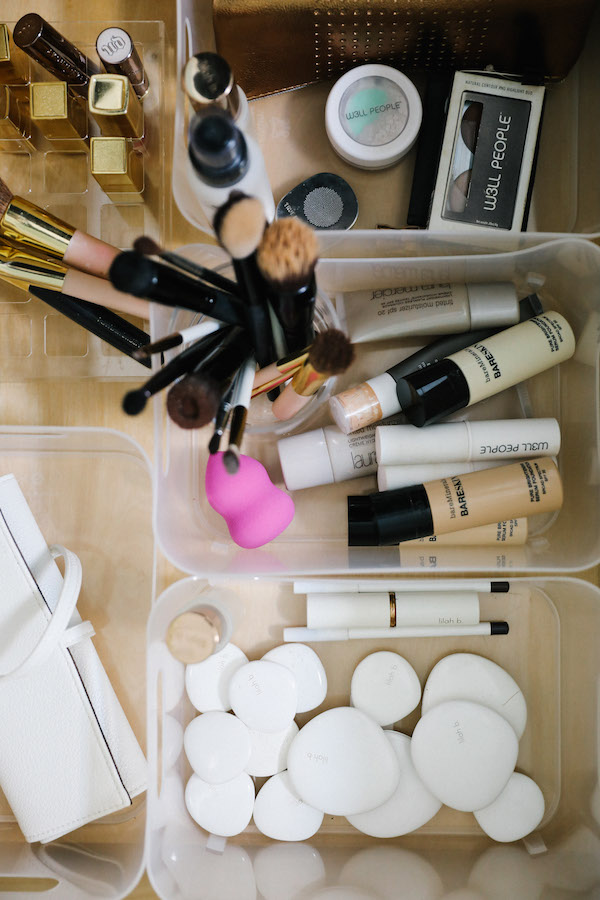
Here’s the Before of my vanity. #Nojudgements

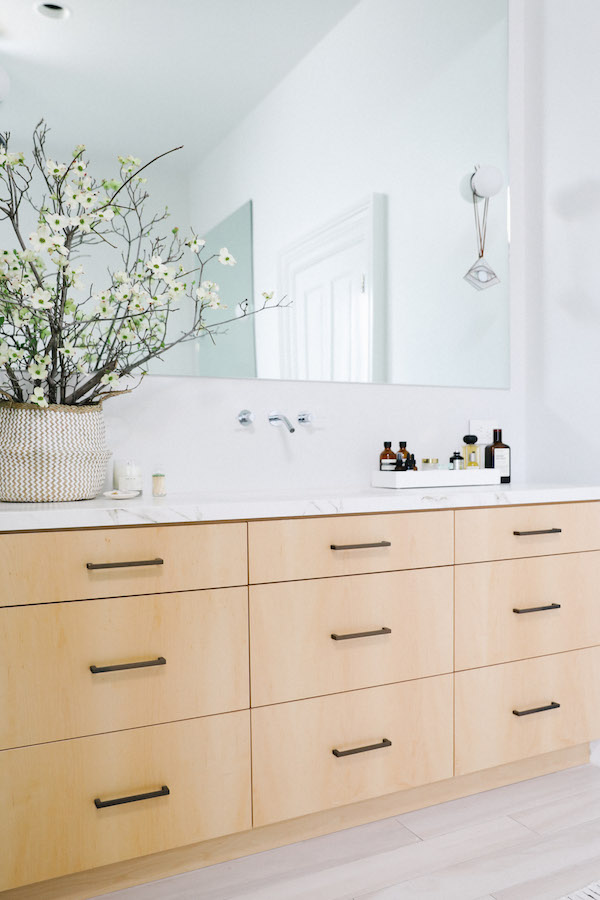
And now the after. Ahhhhh.

How do you think I did with my spring clean??

I took three very simple steps to tackle my mess and I wanted to share them with you today because this makeover is proof positive that cleaning a seemingly overwhelming mess is not only possible but oddly satisfying.

STEP ONE: The Purge. I went through each vanity drawer and ditched anything that was old, unused or no longer wanted. Turns out I’m a bit of a hoarder! I was also ruthless about what I kept. That face mask sample I got that some Sunday night I’ll finally try? Out. Random deep conditioner for my hair that I’ve used once? Gone. The multivitamin I swore I’d start taking that’s probably three years old? Ta-ta. If I wasn’t using it on the daily or hadn’t touched it at least once in the last three months – it had to go. I won’t sugar coat it. Sorting through all my stuff did take a couple of hours, but for those of you who don’t hold onto seven year’s worth of makeup (no joke), you should be able to get through the purge stage much quicker.

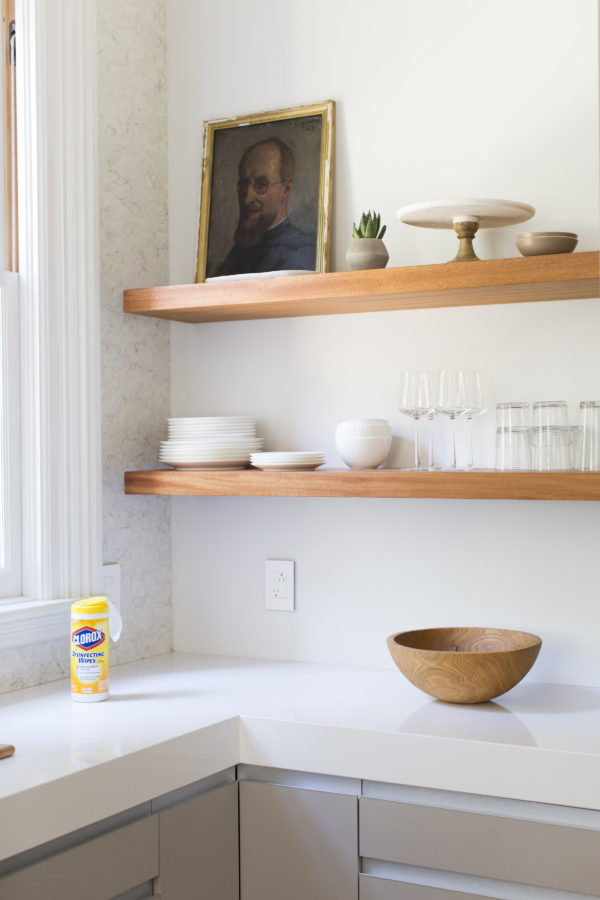
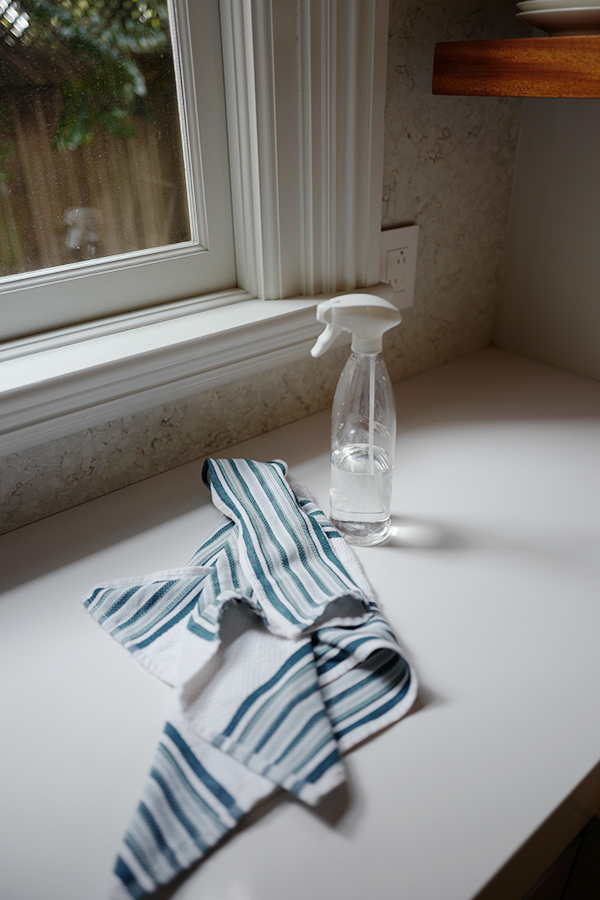
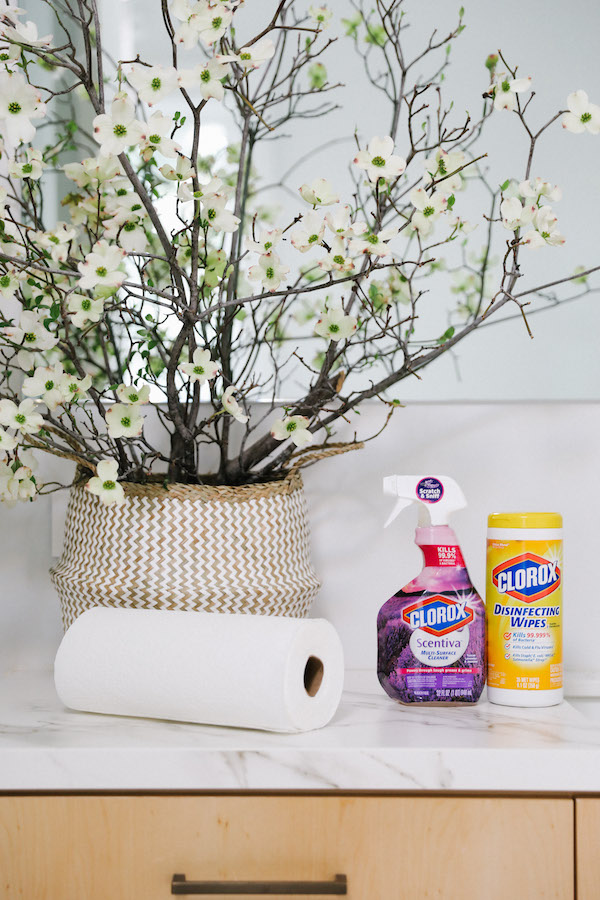
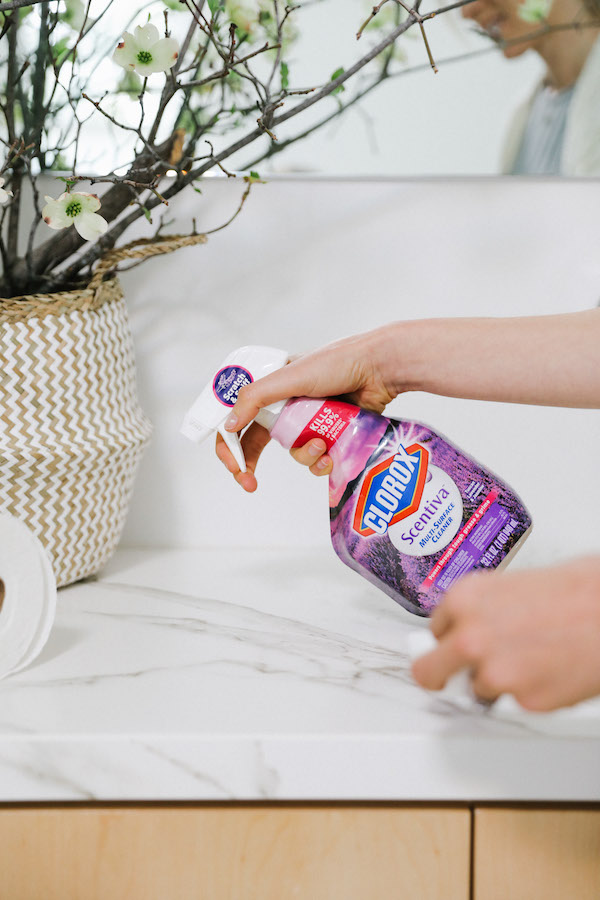
STEP TWO: Deep Clean. With the vanity completely empty, I got down to the task of deep cleaning. Thankfully Clorox® made it super easy with their Disinfecting Wipes. I was able to deep clean each corner and crevice, not only of my drawers but also of things like my toothbrush holder, trays and drawer organizers easily removing the unwanted germs and grime that may have been lurking there with one swipe. A thorough wipe down of the vanity’s exterior with Clorox® Scentiva Multi-Purpose Cleaner meant my counters, sink, faucet and even drawer hardware got the deep clean they desperately needed. Scentiva Multi-Purpose Cleaner has a custom-blended scent so my vanity was not only disinfected but also smelled of lavender. And this step took less than 15 minutes!

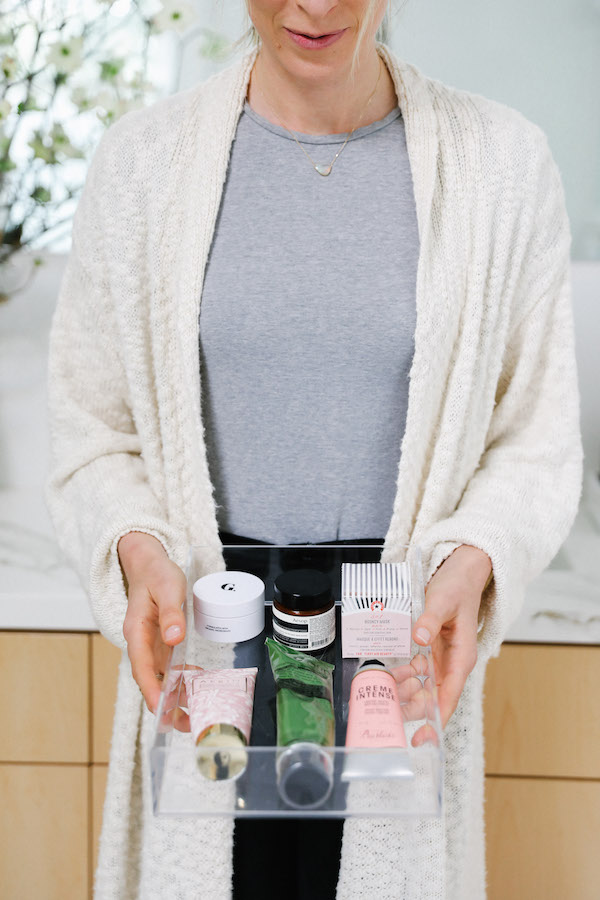
STEP THREE: Organize & Prioritize. This process starts with the removing of the things. Then there is the putting back of the things. Hopefully, if you’ve successfully purged, the number of things will be a lot less. I also highly recommend investing in drawer organizers. I more than quadrupled my number of bins and trays to keep makeup, skincare, hair stuff and all those other bathroom odds and ends corralled.

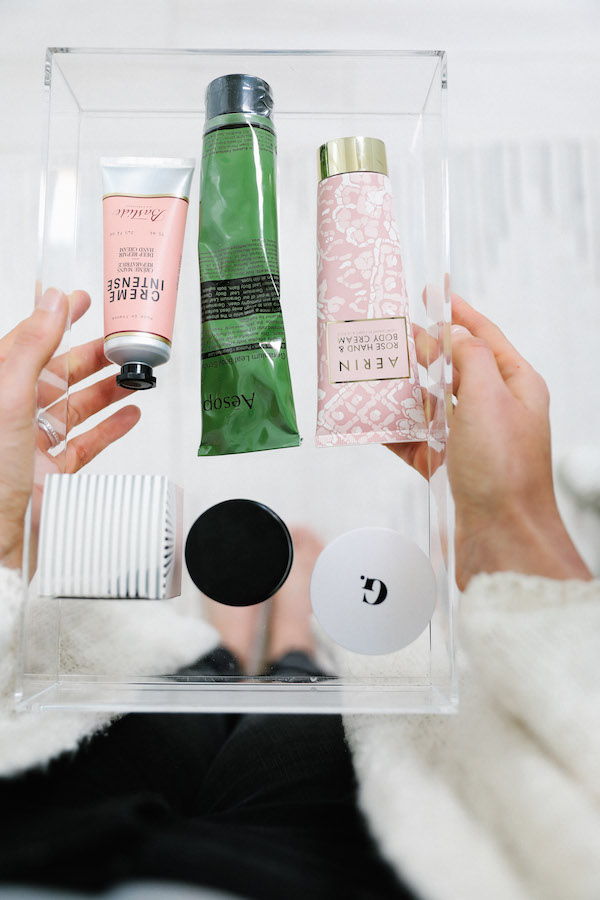
Then I grouped things strategically. Everything I touch each morning and evening either went into a bin in my top drawer or into a tray on my countertop (the place of pride for the pretty bath products – not where I put my stretch mark cream!). I finally organized my makeup so all my brushes were in one easy-to-access cup. My favorite products were all grouped together for quick access. And yes, I did keep a hand cream, face cream and facial mask (or three or four) but I made sure they each had a place – so I always know exactly what I have. If your bathroom is too crammed with products, you’re never going to actually use any of them. Now I know I’ve got a good moisturizing mask, a deep cleanser and an exfoliant that I can mix into my nightly routine every week.

So there you have it! I was able to make (relatively) quick work of getting my vanity back to its dream state and I’m committed to making sure it doesn’t slide back into that gross situation again. My Clorox® Disinfecting Wipes have their own spot in my vanity so I can whip them out and make sure those drawers stay clean on the regular.

Still not convinced you can do this too? Check out the video we made that breaks down how to tackle your spring deep clean (and gives you more of a tour of my bathroom!).

The Secret to a Seriously Good Deep Clean from Erin Hiemstra on Vimeo.

This post is in partnership with Clorox®. All thoughts and opinions are 100% my own. Thanks for supporting posts that have kept Apartment 34’s doors open.

original photography & video production for Apt34 by Andrea Posadas Creative

You can feel it, can’t you? The burst of energy? The desire to get outside. The need to just do something. The whole spring renewal thing is legit. Hence why it really is wise to harness some of that new-found energy and put it toward…spring cleaning! It is a thing and it is a super smart thing to actually do. After being cooped up for the winter now is the time to shake off the cobwebs, both figuratively and literally. But now that I’m back to being a homeowner after many years of loft living, tackling the spring cleaning to-do list can feel rather daunting. When strapped for time, spring cleaning is hard to get started. However, I’ve found a formula that will help you get it done without feeling overwhelmed. Because there’s nothing better than the sense of accomplishment when you complete a good cleaning sesh. And neat, clean spaces have been proven to lower stress and anxiety levels! We all need that. If you use the tips below, I promise you’ll get to the aww, I just got off work on a Friday-afternoon feeling asap.

To kick off your spring cleaning regimen, map out your cleaning game plan. Dedicate 15 minutes to organizing all of your cleaning supplies and deciding which rooms you plan to tackle and the products you’ll need. Then, assign a day to tackle each of those spaces. This step will keep you from feeling completely overwhelmed when you aren’t quite sure where to start.

how to tackle spring cleaning on apartment 34 how to tackle spring cleaning on apartment 34

Then, it’s time to clear the clutter and prep for the deep clean. Bedrooms and bedroom closets are hot spots for clutter, so they’re often a good first room to be cleaned during spring cleaning. And for more than one-in-four Americans, the pantry and kitchen drawers also gather clutter. I recently tackled both my pantry and my closet and could not be happier with the result. When it comes to cleaning a pantry (or cupboards – the definition of pantry can be loosely applied), ditch anything that is expired or you haven’t touched in at least six months. You can check out my pantry organization post right here for how I pulled my pantry together.

I took a similarly tough approach to sprucing up my closet for the new season. Since I finally have my own closet, I have no excuse not to keep it organized. Why is that always so much easier said than done?? Anywho, I finally tackled the beast. Anything really worn out or looking sad? Out. Anything that doesn’t fit well? Out. Anything I haven’t worn in six months (excluding seasonal items) out! That actually opened up some space, but you’ll have to wait until next week for the rest of my closet tour and my spring wardrobe wish list.

how to tackle spring cleaning on apartment 34

Once key spaces are clutter-free, tackle the most dreaded chore on your list first. Deep cleaning the bathrooms is most definitely my least favorite cleaning activity – I like organizing the stuff – attacking the actual dirt just grosses me out. But once you conquer your most dreaded space, whatever it is, the rest of your spring cleaning chores will feel like a walk in the park!

how to tackle spring cleaning on apartment 34

To keep yourself motivated through your cleaning sessions, allow yourself to take breaks. Snacks and screens, whether be it the television, computer or smartphone, are the most popular ways to take a break during cleaning sprees. For women, in particular, snacks, checking e-mail and catching up on social media are go-to ways to break up a long cleaning session. So set the phone in the other room until you finish a task and then you can give five minutes of Insta-Stories time (are you totally addicted? yeah, me too). Creating even larger incentives for yourself, such as hosting a get-together for the finale of your favorite TV show, or taking a well-deserved staycation once you tackle everything on your list, will also keep you motivated throughout the cleaning process.

how to tackle spring cleaning on apartment 34

And you can always look for ways to make your life easier. To tackle dust I use a reusable dust cloth which is dry and non-abrasive to trap and lock dust, allergens – even pet hair away. I use them on furniture, electronics, blinds, frames, baseboards, floors and more. Pro tip, to keep guest areas low maintenance put potted plants next to the bed instead of fresh flowers so you don’t have to worry about wilted blooms and dripping pollen falling everywhere.

how to tackle spring cleaning on apartment 34

While the spring cleaning list can sometimes feel long, you can, in fact, power through it without devoting your life to the task. Simply make your list of the must-tackle projects and check ’em off one-by-one. Turn up the volume on your favorite playlist or catch up on a good Podcast. I can even get my kiddo into the cleaning act. He thinks sweeping is the cat’s pajamas. Although he really only moves dirt from one part of the floor to the other, it’s the thought that counts, right?

I’ve listed out what I would recommend tackling this spring cleaning season below:

SPRING CLEANING CHECKLIST

> Dust all crown molding, baseboards, light fixtures, ceiling corners

> Wipe down all blinds, clean curtains or any other window coverings

> Clean all doors and windows inside and out

> Disinfect all door and cabinet knobs, as well as counters and other hard surfaces

> Disinfect remote controls, dust & disinfect all of your other frequently electronics, keyboards, mouse, your phone (make sure to follow instructions – they can be sensitive to various cleaners)

> Change out any air vents and filters throughout the house

> Thoroughly vacuum all rugs and clean floors under them

> Wipe down all furniture, making sure not to miss corners of shelving units

> Clean out all your countertop appliances as well as your refrigerator, oven and microwave

> Swap out all bedding, flip your mattress, clean the mattress coverings

> Clean under the bed

> Disinfect your toothbrush holders, soap dishes, shower curtains

> Clean out your medicine cabinet/vanity

> Wash all your make-up brushes and throw out expired or seldom-used make-up (this post is helpful for that)


For even more peeks into our house (I swear it’s going to be done soon!) – CLICK HERE.


original photography for apartment 34 by Michelle Drewes

I’m the first to admit I’m not the neatest person the world. For a time I was. Growing up, everything had a place and there was a place for everything. Down to the mini horse figurines arranged perfectly on my desk! But somewhere in the teens that all went out the window and I’ve struggled to stay on top of messes ever since. But now that I’m a mom (why does it still feel so weird to say that?! My kid is nearly three,) it’s dawned on me that I finally need to get my act together. It’s not cute to have your house looking like it’s run like a teenager when there are no teens in sight. So I’ve slowly but surely begun putting intention around my neatness goals. Just saying “I want to be neat and organized” isn’t enough. That leaves way too much wiggle room. Instead, I’m making specific to-do’s for every room our house. I figure if I master these tips, by the time my kiddo starts his first day of pre-school, I might finally look like I have my sh** together. Fingers crossed.

I also thought a little moral support would both keep me honest and keep me motivated to practice what I’m preaching. So I want to share the 10 tips I’m using to keep my domicile looking, well, civilized.

IN THE KITCHEN

10 cleaning tips

Clean as you go. The secret to keeping a tidy kitchen? Never let it get dirty! Think of your kitchen like they do in a restaurant. It starts the day in tiptop shape and ends the day in tiptop shape. That way you never find yourself overwhelmed by crazy mess. Accomplishing this goal requires the following:

Wipe up spills as soon as they happen. This is especially true around the stove or in the oven. You don’t want to let that stuff get caked on. I love a good scrubber to get off the sticky mess my cooking tends to leave behind.

Wash pots, pans, knives and the like as you’re cooking. Whenever you finish with a pot throw it in the sink with some water and soap. As something bakes, sautés or marinates you can give that pan a quick rinse and put it away.

Immediately fill the dishwasher and put everything back where it came from. Force yourself to take the two or three minutes after you finish eating – you know that time when all you want to do is grab your wine and sink into the couch – but quickly load the dishwasher and put away any remaining cooking implements or ingredients. Then, and only then, is it wine time.

By implementing these tips, you’ll be ready to settle into your binge-watching sesh after giving the counter one final quick wipe.

IN THE BATHROOM

10 cleaning tips

Cleaning the bathroom is quite possibly my least favorite thing of all the things. But is it really anyone’s favorite? I can’t imagine. Thankfully, if you’re diligent about implementing a few quick cleaning tips, you can avoid the dreaded deep cleaning session.

Wipe down counters and hardware daily. Be it in the morning after you get up, or just before you head to bed, give your counters a quick wipe down. Sometimes that might mean simply drying them off. But if you got a little overzealous with your dry shampoo or some toothpaste spilled in the sink, grab a spritz a little good smelling cleaner on there and you’ll get all that grime off in one swipe.

Clean the toilet more regularly. If you’re like me, you don’t think to clean a toilet until it needs it, aka when it’s really bad. But if you take 60 seconds at least once a week to give it a quick clean you won’t ever hit the gross-out point. I never have to worry about the state of my toilet if an unexpected guest drops in.

Give all surfaces a thorough clean weekly. This includes the mirror, the floors, the tub and shower walls. This will fight against soap scum buildup and that layer of film from the various beauty products we all use.

IN THE BEDROOM

Apt34-cleaning-tips

It can be easy to neglect your bedroom, especially if, like me, you only collapse into it at 10pm every day. But, if your bedroom was organized, clean and inviting, would you be inclined to spend more time there? Thought so. Try these tips to help keep your room feeling more like your sanctuary.

Keep the dust at bay. Allergens are a huge issue in the bedroom. To keep them down, dust at least weekly, if not every three days. A pretty duster is great for this. You want to especially dig into windowsill corners and the nooks and crannies of your headboard or bed frame.

A fresh bed is a happy bed. Washing your bedding weekly is the best thing in the world. I love my all white beds and Clorox Oxi Max Radiant White helps me keep mine nice and bright even with a little human and pets.

Kill germs. If you get nailed by a bout of norovirus, like our household did a couple of weeks ago, you will want to wipe down all door knobs and hard surfaces with a disinfecting solution. You can check out my post on how to do that right here.

Do you have any pro-tips for keeping messes at bay? I’d take as many suggestions as I can get!


SHOP THE POST

 [show_shopthepost_widget id=”3069931″]

For more cleaning tips CLICK HERE.


image 1 by tom blachford / image 2 by elizabeth roberts / image 3 by aubrie pick for apartment 34


When it comes to cleaning, we all have misconceptions on what works best and what cleaners serve multiple purposes around the house. Homemade is great when it comes to cookies, but isn’t always best when it comes to cleaning. Especially when germs are involved. Clean or to sanitize/disinfect? How many people really know the difference between the two and what should they do where and when? There’s a difference between making your white counters sparkle and actually getting them clean – aka germ free.

apt34_whitekitchen

Even when you think you’ve got this domestic goddess thing down, you might be surprised by what can be hidden in plain sight. During cold and flu season, myths can be just as contagious as the germs circulating. Between old wives’ tales and unique cleaning remedies, it can be hard to decipher what is myth and what is reality.

In order to stay healthy this season, it is important to know the difference between cleaning and sanitizing/disinfecting to keep your home safe. The kitchen and bathroom are places that can get exceptionally germy and require special attention. Knowing a friend whose toddler ended up in the hospital after getting the flu this year, I’m certainly feeling very motivated to keep bad germs at bay, I recently read that there are more E.coli in a kitchen sink than in a toilet after you flush it! Ew.

Apt34-Thermador-8299

While there is a lot of talk around about cleaning alternatives, I was stunned to learn about the nitty-gritty differences between cleaning and disinfecting. I’ve often used a mix of vinegar and water to cleanse my kitchen surfaces. However, it’s been proven that vinegar is not as effective as bleach and does not kill as many germs. Researchers in infection control tested 5% vinegar against some common human pathogens and antibiotic-resistant bacteria and found that vinegar only kills 80% of germs and 82% of mold. Bleach disinfects to kill 99.9% of germs and bacteria.

And bleach is in fact a natural compound. When added to water, it will disinfect and then turn into totally harmless table salt. Literally. In fact, if you’re in an emergency situation when you’re out in nature, you can purify water yourself with regular bleach. Simply add 1/8 of a teaspoon of bleach (not scented) to two gallons of water – or two drops per quart, cap it, shake well and let it sit for 30 minutes. It might not kill every parasite in existence but it will kill all of the bacteria – rendering it safe enough to keep you alive! I never knew that.

apt34clean

The key to using bleach correctly and safely is diluting it. Sure, no one appreciates the smell of a bottle of pure bleach. That’s because it’s highly concentrated to make sure the germ-killing power doesn’t degrade over time. But when you dilute bleach it becomes easy to work with while retaining its highly effective cleaning and disinfecting properties.

While you probably don’t need to disinfect on the daily (unless you have someone who is already sick in your household) you can use Clorox® Regular-Bleach to disinfect to keep your family safe by helping to reduce the spread of germs.

You can use Clorox® Regular-Bleach to clean and disinfect frequently touched hard surfaces, such as the bathtub, bathroom sinks and light switches, by doing the following:

> Use 1/2 cup of Clorox® Regular-Bleach in 1 gallon of water.

> Thoroughly wet the surface with the solution and allow it to remain on the surface for 5 minutes.

> Rinse with clean water and dry.

I had no idea, but you can in fact use Clorox® Regular-Bleach at home to sanitize sippy cups, teething rings and rubber duckies

> Make sure to select nonporous toys that are washable.

> Clean toys weekly according to instructions, keeping in mind that many toys can simply join your dishes in the dishwasher.

> Disinfect washable colorfast plastic toys with a solution of ½ cup Clorox® Regular-Bleach and 1 per gallon of water. Soak for 5 minutes, rinse and air dry.

Baby bottles, nipples, dishes, teething rings, sippy cups and high chairs can also be easily sanitized using Clorox® Regular-Bleach1. Soak washed items for 2 minutes in a solution of 2 tsp of Clorox® Regular-Bleach1 per gallon of water. Pour solution through nipples. Drain dry.

Trust me, before having kids I did not put nearly so much thought into the science behind cleaning, but now that I’ve got a little germ farm running through my house on a daily basis, it puts things in a new perspective. And since I did just invest the past two years in creating my dream kitchen, i might as well take proper care of it!

Here’s to staying happy and healthy this winter.

This post is in partnership with Clorox. All thoughts and opinions are 100% my own. Thanks for supporting collaborations I’m excited about and that have kept Apt34’s doors open